UniBox
A university SwiftUI & Arduino project
UniBox is a university project that I made during my second prototyping course.
I was tasked to create a digital prototype in Xcode with SwiftUI meant to complement a physical prototype made with Arduino code and components.
The basis of the project was research done in a previous university course group project regarding students living alone and values such as sharing and community.
Background
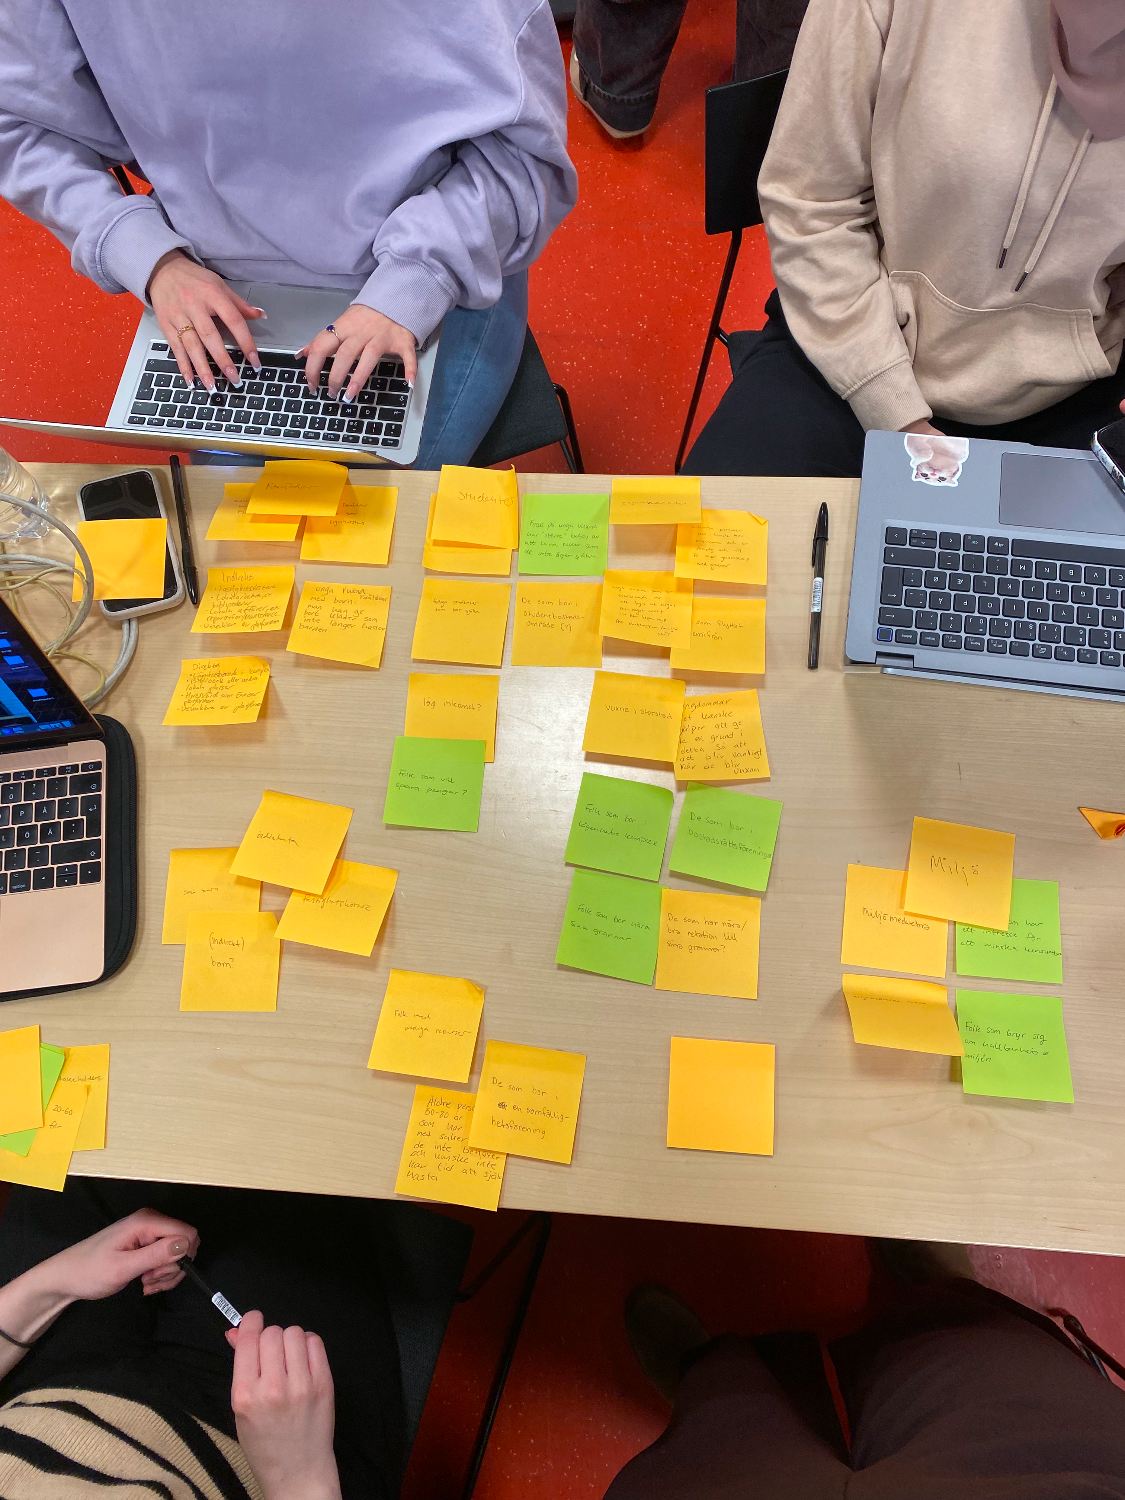
The research regarding user needs and requirements was done in a group previously, during a user-study course. My group chose a design brief regarding making a product used for enhancing the value of sharing and community. We used brain storming and affinity diagrams to come up with indirect and direct stakeholders for the system.
We chose the target group university students who live alone in Sweden, and through interviews and observations figured out that they are in need of certain objects that they do not own, such as tools, electronics and more. This was due to various reasons, for example economical or due to limited space in the apartment. We decided a locker placed in student living facilities filled with different items they may need from time to time would be a good solution.
Wireframing & user flows
Then, during the prototyping course, the group members branched off of this and made our own individual prototypes. During the whole design process I used divergent prototyping to try out different looks, feels and functions of both the physical and digital part of the prototype.
I started off by designing the digital prototype.
After deciding on my idea I started off by creating simple wireframes and user flows in Figma to come up with the general interface and functions I wanted to use and the features I wanted to create in my digital prototype. I also created a color palette inspired by the design brief.
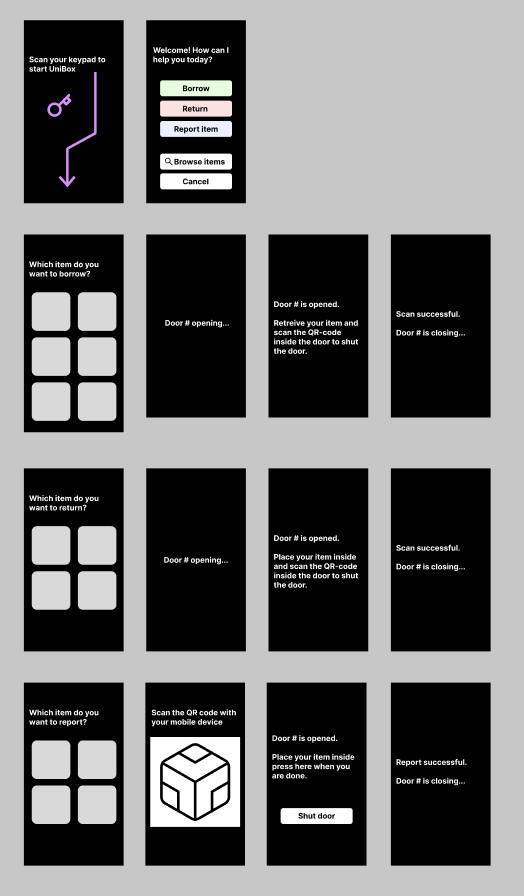
Wireframes
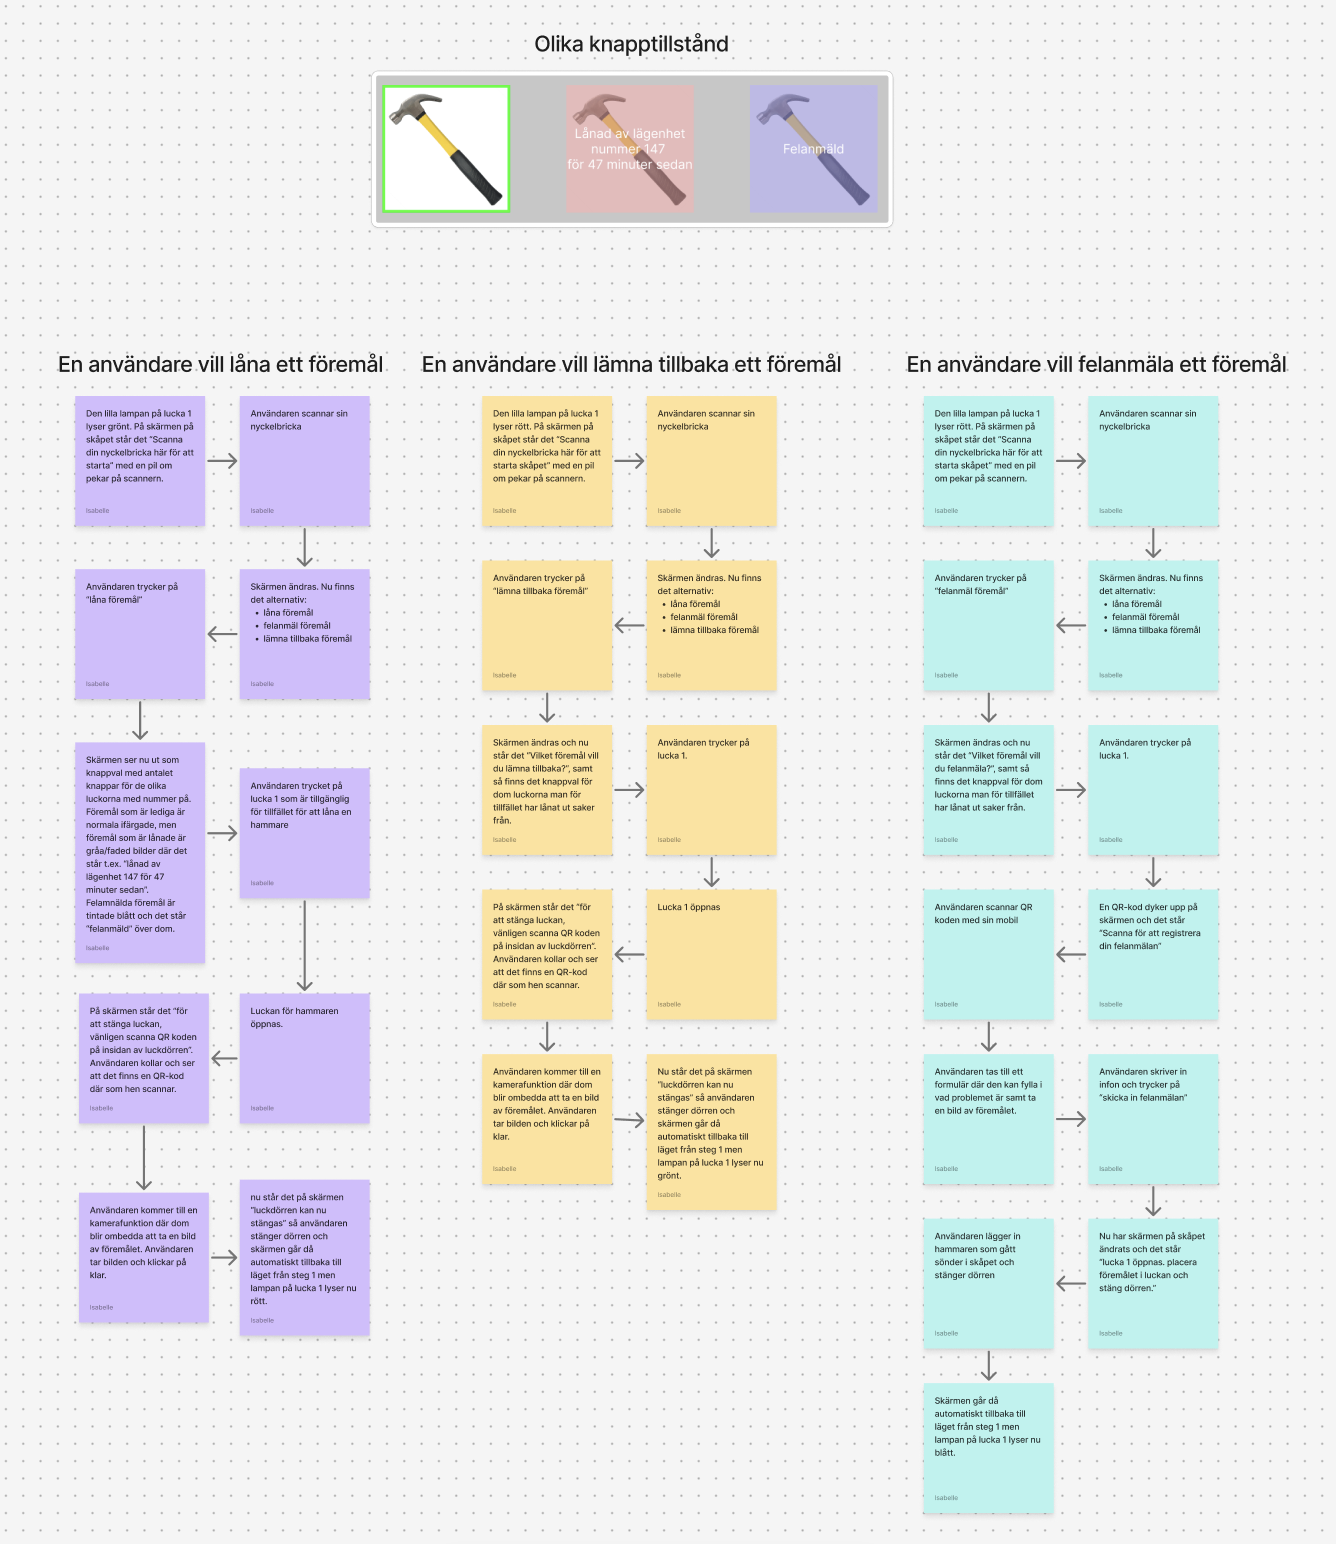
User flows


Color palette
Physical prototype
After this I started working on building the app in Xcode with SwiftUI.
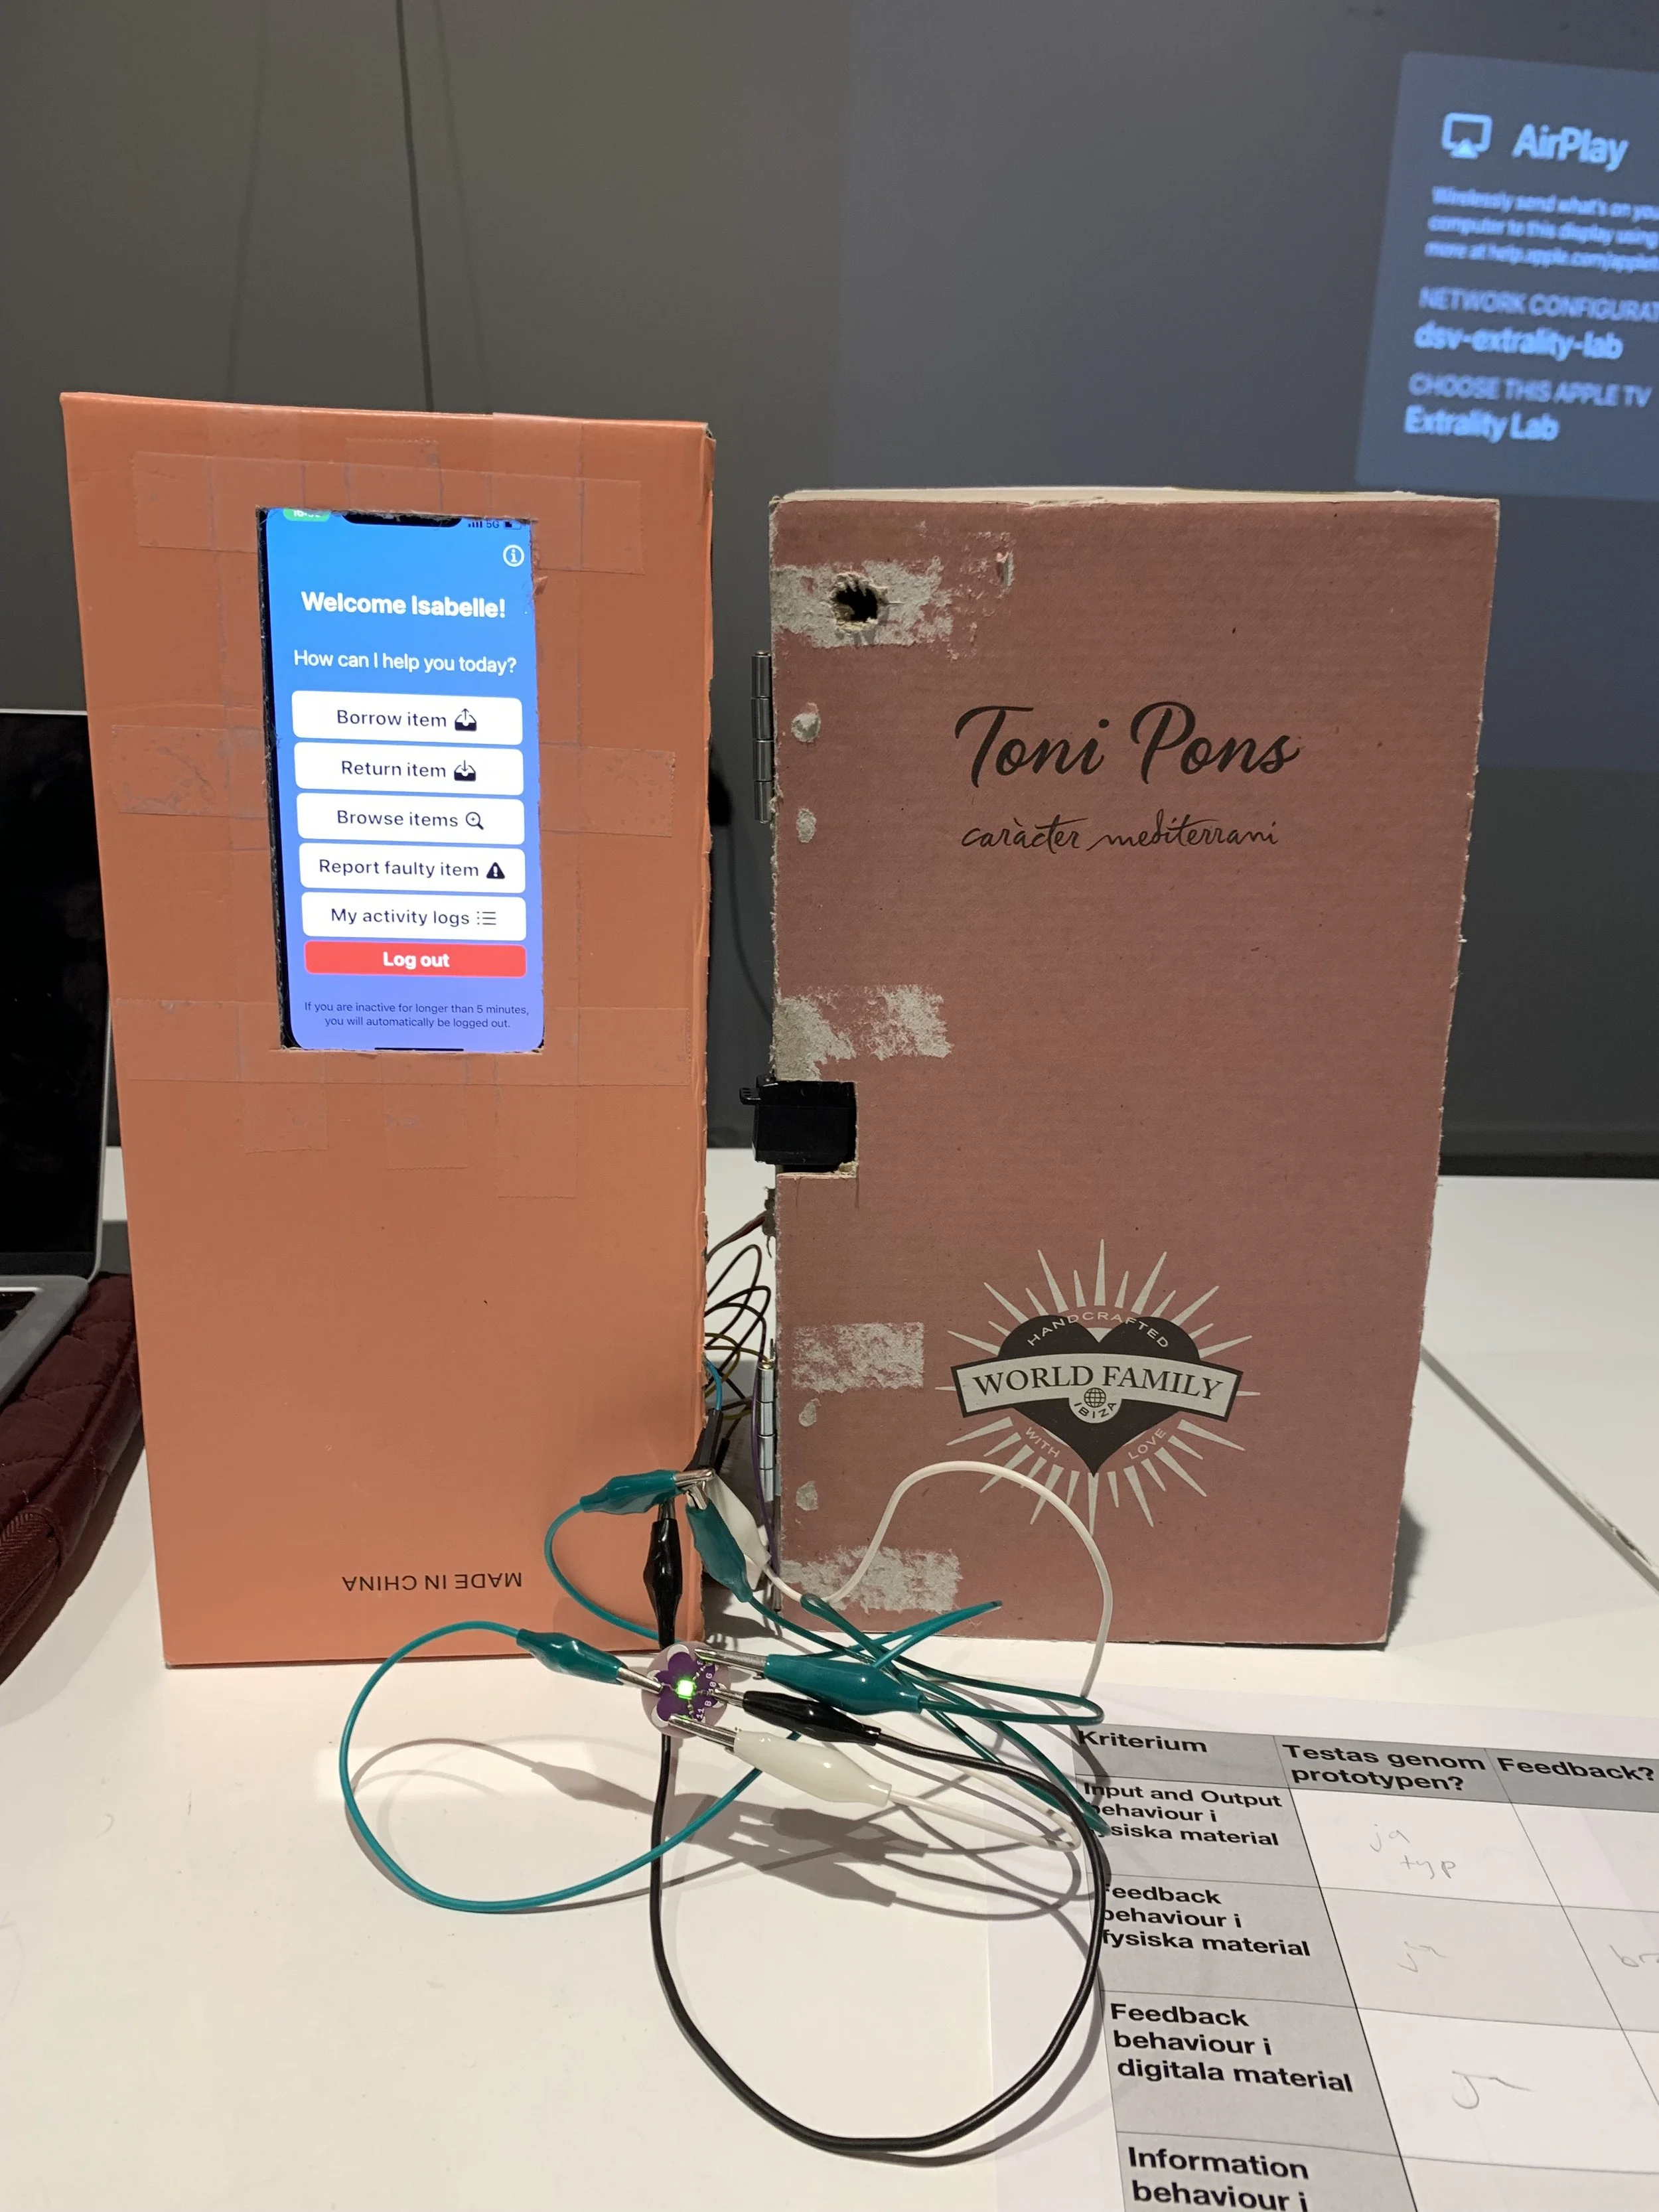
After finishing making the app, i build my locker compartment out of cardboard boxes, paper, magnets and other materials. I cut a hole for my phone screen to place inside.
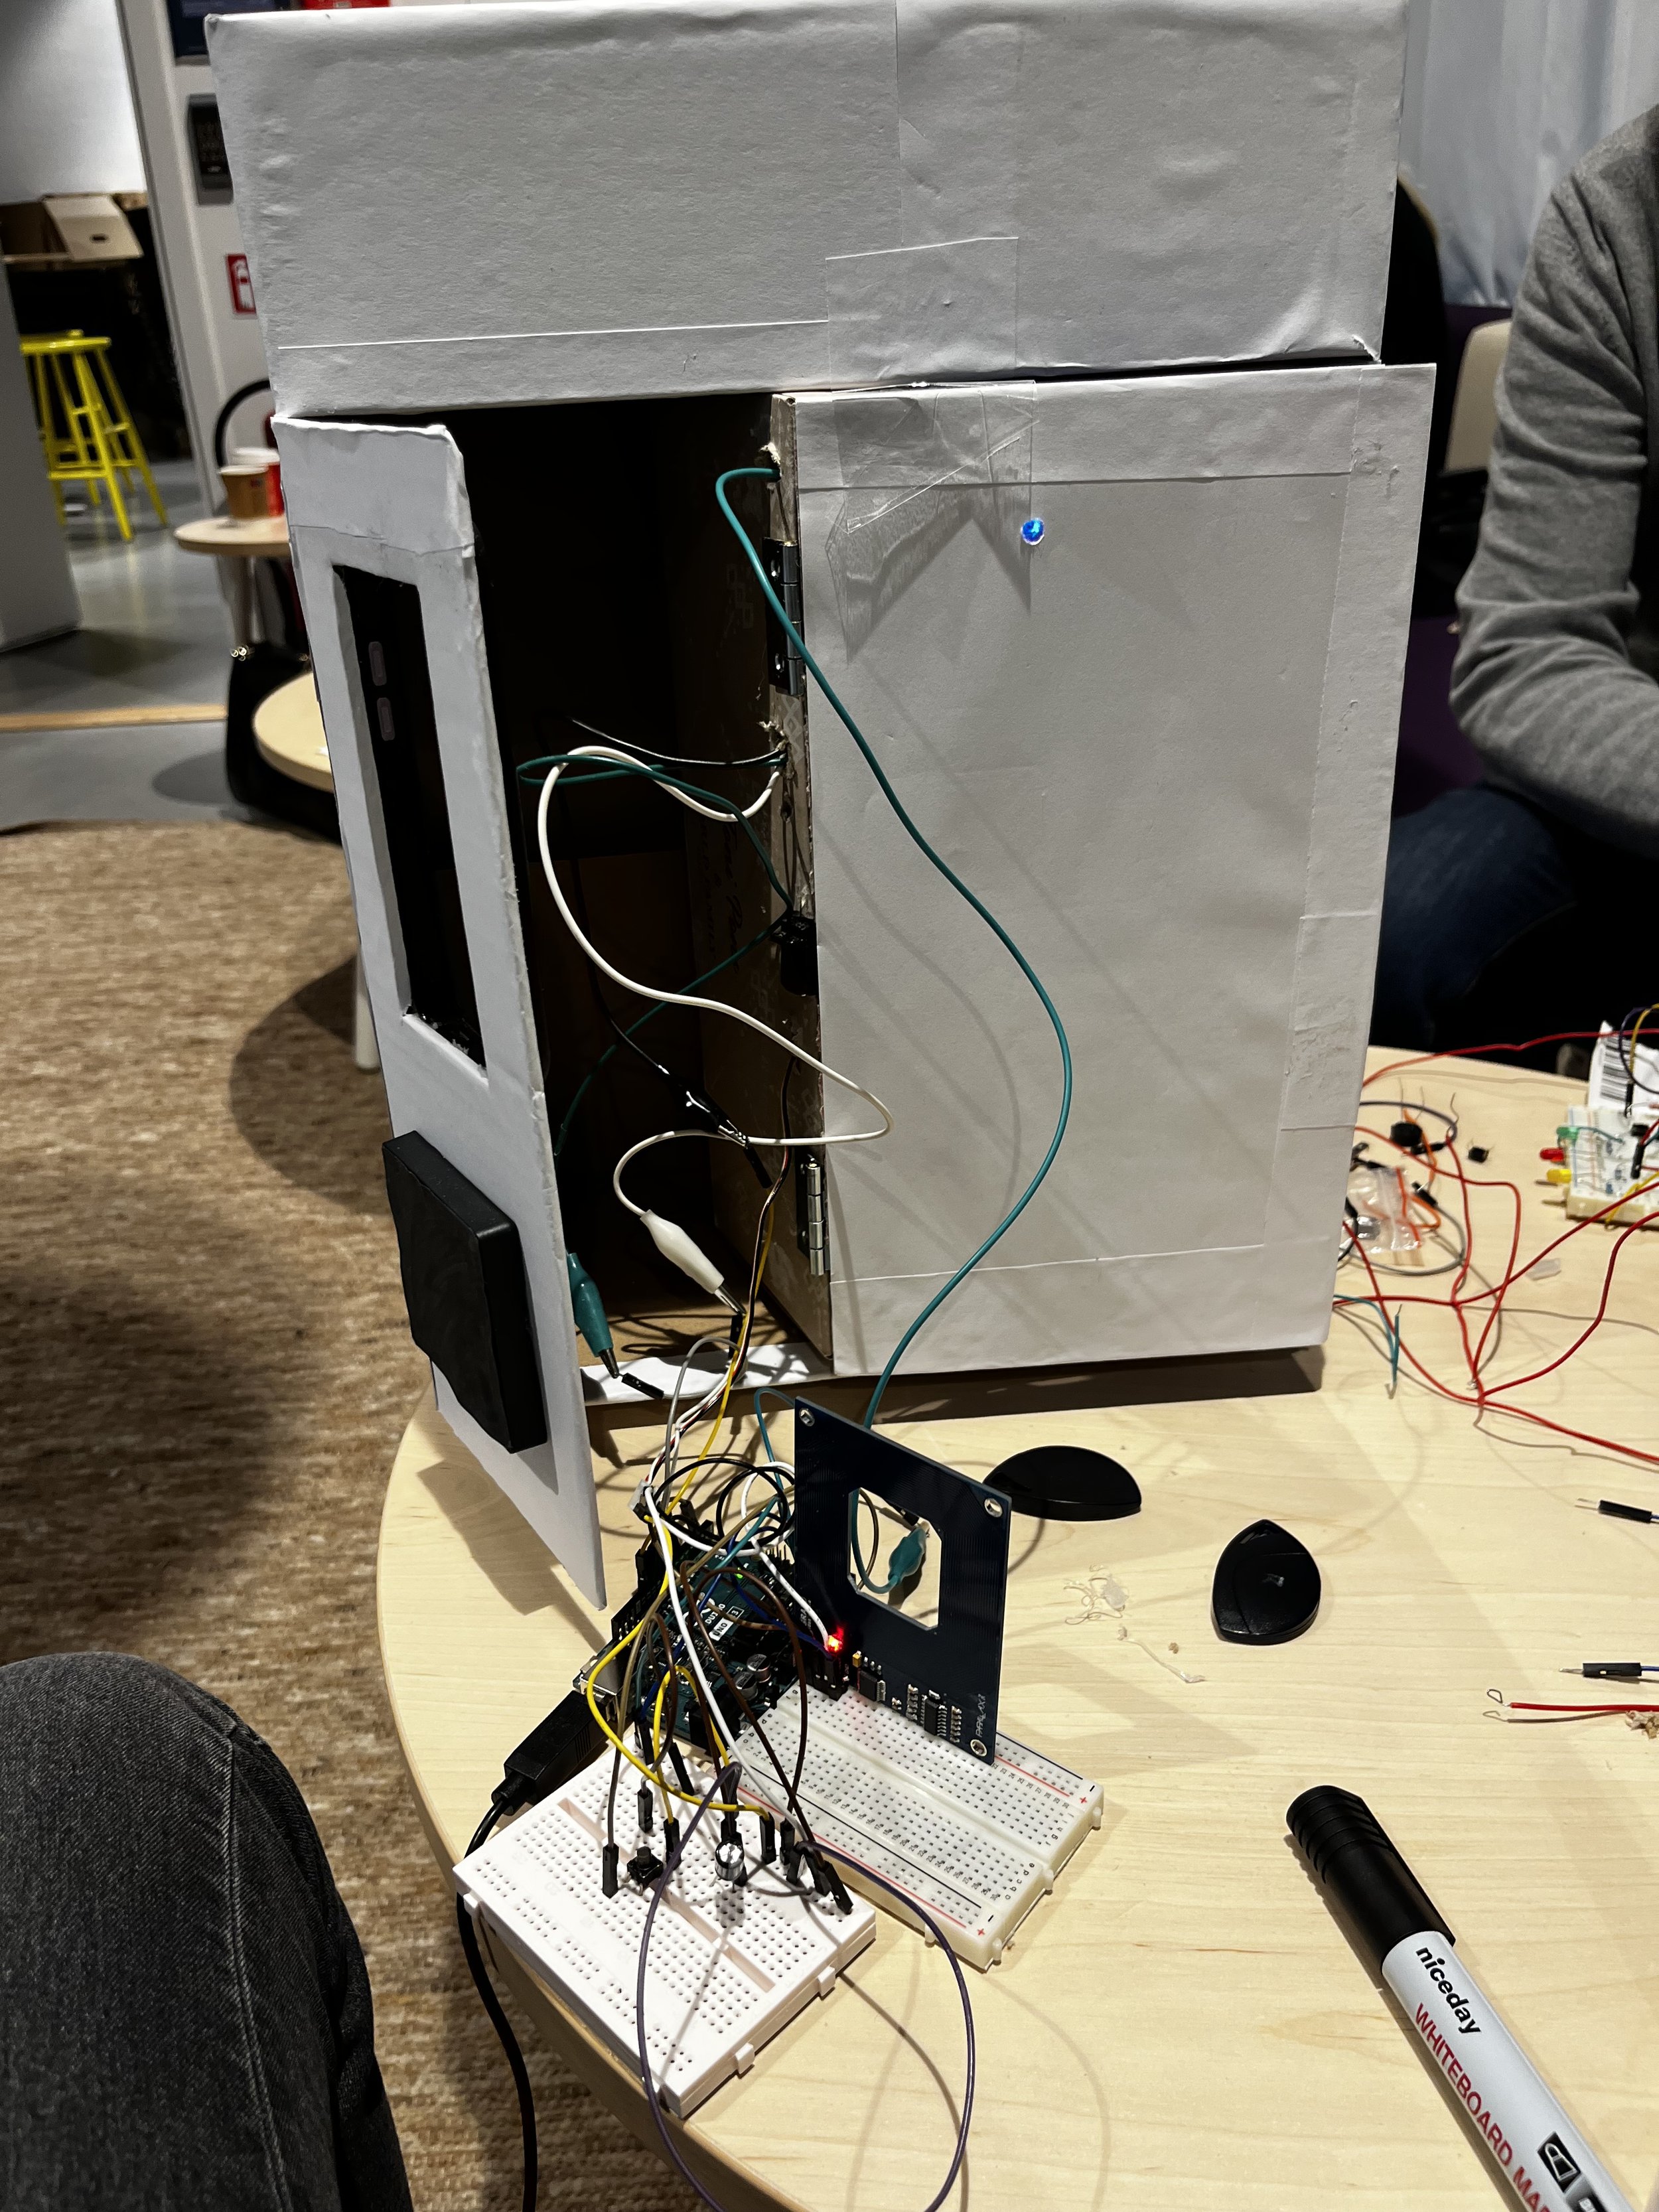
I also assembled Arduino components and wrote code that would correspond nicely with the actions possible on the screen. For example, when borrowing an item, the screen would encourage the user to scan his/her RFID tag and press a button when finished. When they did this, the door would open and the borrow would be successful. In this way, I did not have to use any Wizard-of-Oz techniques while showcasing the prototype.
Early prototype of locker compartment to try out positioning of Arduino components
Locker compartment starting to come together. Covered in paper & glue for a smoother look.
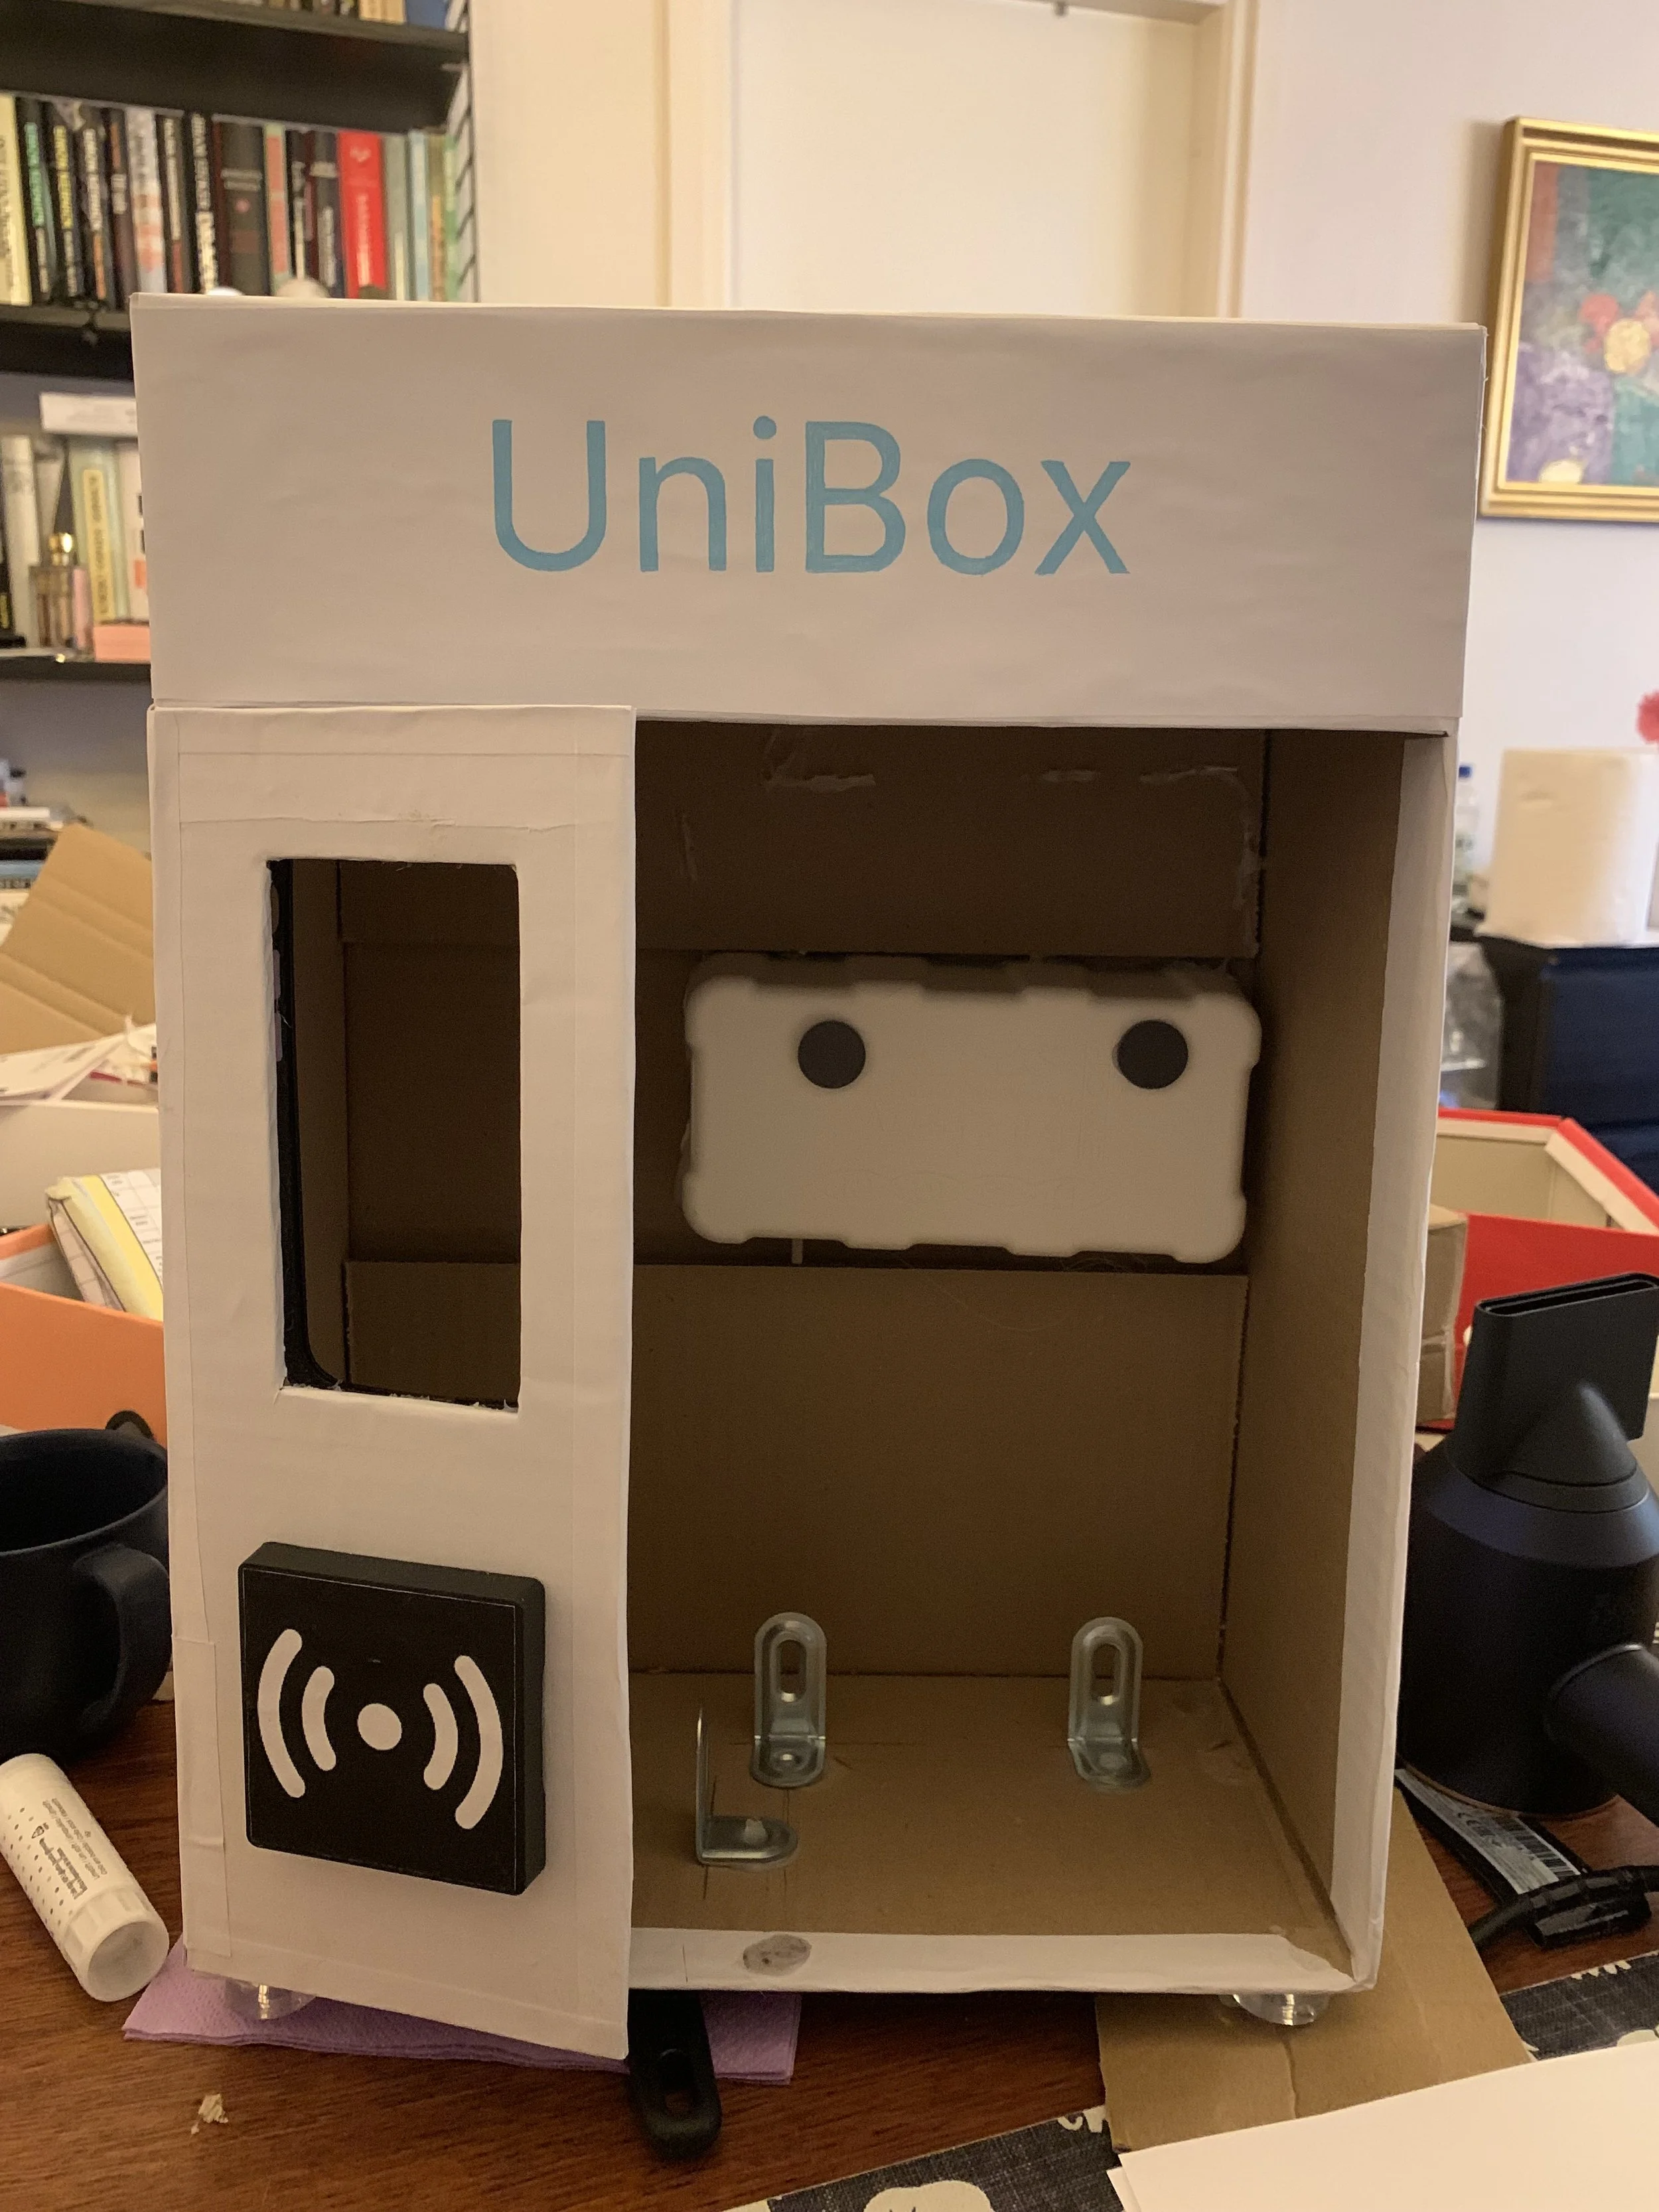
Finished prototype with the door compartment taken out so inside structure is visible. The door compartment was held in place by magnets and metal braces.
End result
Functions and capabilities
I built one door/section of the locker as well as room for a built-in screen with a menu for operating it.
The locker has three main functions; to borrow items, return items or report faulty items. When an item is free, a green color is used in both the app icons and on the physical lamp, when it is borrowed, red and when it is reported, blue. The prototype also included pop-ups and sound effects.
Since one of the goals of the project was to work with real data, I also created an activity log where you get information about which items you have borrowed/returned/reported and at what time, as well as a page for weather-related usage statistics of the locker's items using a weather API. The locker looks at the weather in Stockholm at the time of use and shows which items are most commonly borrowed in the current type of weather.
Finally, I created a page where you can scroll through information about all the items in the locker, with information taken from real products that could possibly be found in this type of locker that I found in online stores.
Video showing borrow, return and report functions.
Technologies used
The menu app was made with Xcode & SwiftUI and installed as an app on my iPhone 13 that I then installed inside the locker.
Arduino components were used to give the locker opening and closing mechanisms with a servo motor, an RGB lamp indicating item status as well as an RFID reader to help with the illusion of operating the locker. Although i did not have access to the tools to make the Xcode prototype communicate with my Arduino I programmed the features of the physical and digital prototypes in such a way were it looked as real as possible!
For the weather statistics I connected the app to OpenWeather.org with an API key.
Video showing report item process.